


Now let's colorize the shape.
Left Click the shape with the "Pick Tool",
go to the "Fountain Fill Tool" (its in the left bottom toolbar or press F11).
Set the fill type to Radial and set the Color in the left to a custom color or others with the value of "C 96 M 73 Y 35 K 4"
and Set the color in the right to Cyan.

Step 11 Duplicating the Texture
Select the shape by click using the "Pick Tool"
1. Copy, rotate and duplicate by holding "Left Click + Right Click + Control", drag and
rotate them clockwise.
2. After that click the smaller shape and color them black,
select both big and smaller shape with the "Pick Tool", group them by pressing "Control + G"
and drag them to the center
3. Done

Step 12 PowerClip Container
Put the pupil into the eye body
1. Group the pupil by selecting it with the "Pick Tool" then press " Control + G"
2. Place the pupil inside the eye body container by using "PowerClip", go to the top toolbar find "Effect
+ PowerClip + Place Inside Container ". You will now see your cursor turning into
a black arrow, click the eye body. Now you will see that the pupils are inside the eye body container.
3. Edit the container by pressing "control + double click" to the eye body container, click the pupil and drag them a up so it looks
natural. Finish editing the container by pressing "control + double click" again on any
position inside the container.
4. Done

Step 13 Working with Transparency
Now, make a reflection on the pupil
1. Make two white circles with the "Ellipse Tool"
2. Drag the circle to the eye
3. Set the transparency of the circle by go to the "Transparency Tool", set the type to "Uniform"
set the value to 50
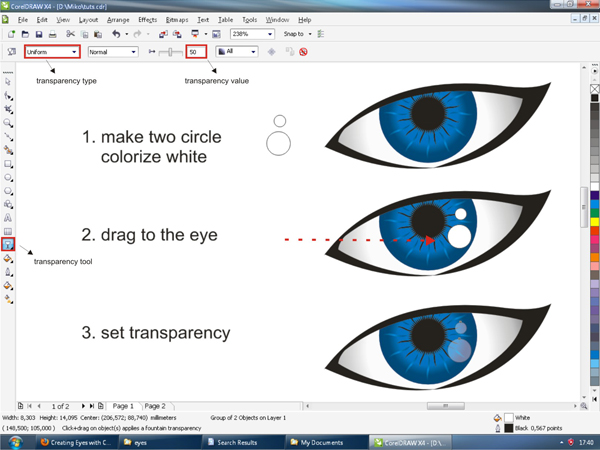
If you have followed the steps correctly, it should look like the image below.

Advertisement
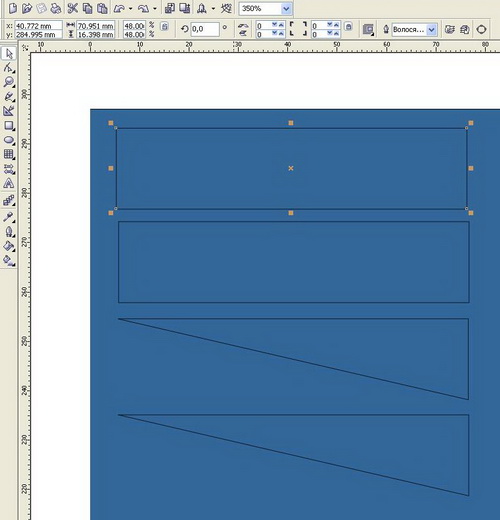
Step 14 Creating Eye Lashes
Now we are going to make the eye lashes
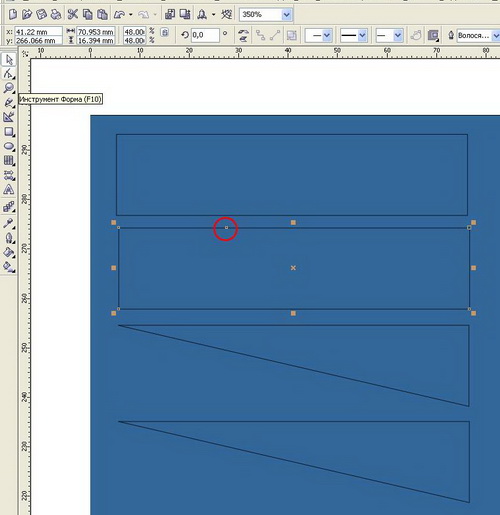
1. Make three boxes with the "Rectangle Tool", as in the picture
below, don't forget to select and press "Control + Q" in order to make them editable
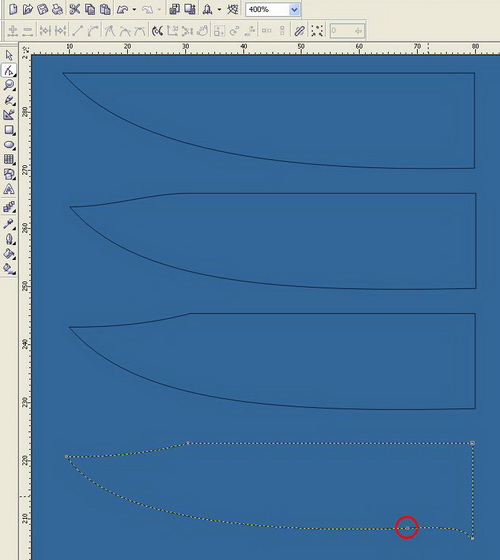
2. Shape and colorize as in the picture below by using the "Shape Tool"
3. Apply the lashes to the eyeliner by clicking and dragging them
duplicate it by holding "Left click + Right click"
4. Use your feeling to create a good looking set of eye lashes

Conclusion
We are now done, you have created a vector based eye with CorelDraw! You can customize the eye by adding more eyelashes, shadow or texture in the pupils. I hope you've enjoyed this tut!


”–ќ є10
—оздаем при помощи инструмента "пр€моугольник" пр€моугольную область произвольной длины,той которую бы ¬ы хотели видеть в качестве длины клинка
ѕри помощи инструмента форма F10 добавл€ем узел на верхней части пр€моугольника в том месте где должно будет быть заострение клинка
|
|
|
ѕри помощи того же самого инструмента удал€ем узел в левой нижней части пр€моугольника

ƒалее пользу€сь все тем же инструментом наводим на диагональную часть полученного треугольника,до по€влени€ черной стрелочки со знаком "змейки",при помощи правой клавиши мыши выбираем преобразовать в кривую

ƒалее выт€гиваем диагональ таким образом (чуть вниз и влево),чтобы получилась заготовка клинка

следующий этап при помощи нашего,успевшего стать почти родным инструмента f10 перет€гиваем верхний левый узел (кончик лезви€) чуть вниз

ƒалее...помните ту точку,которую мы поставили вначале на верхней части пр€моугольника,так вот...наводим любимый инструмент на эту точку,жмем правую клавишу мыши и выбираем опцию "заострение",дл€ того чтобы манипулиру€ с левой частью вектора,права€ осталась неподвижной...и делаем заостренный изгиб

ƒобавл€ем в нижней правой части лезви€ новый узел (двойной челчек) f10 и сразу т€нем его чуть вверх и влево,дл€ придани€ лезвию более совершенной формы
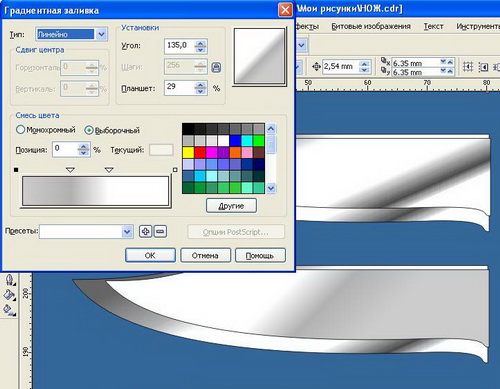
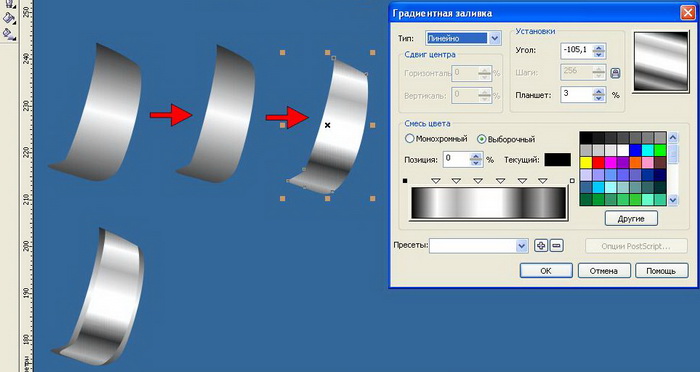
добавл€ем градиентную заливку приблизительно такого плана

в результате имеем вот такое лезвие

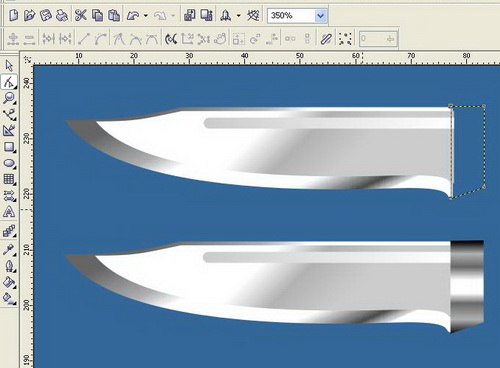
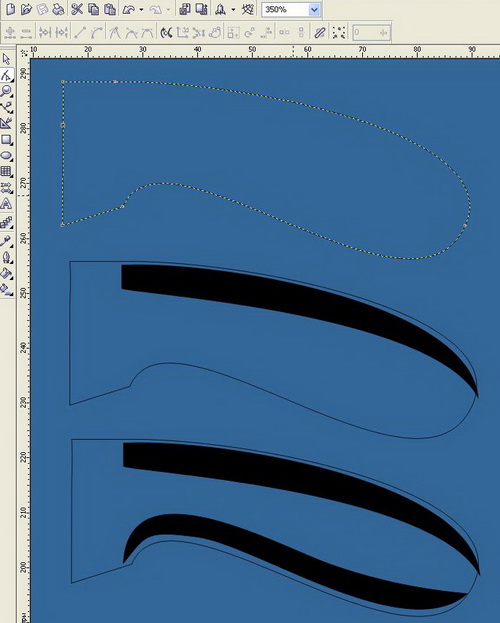
затем копируем полученное лезвие при помощи клавиши копировать и вставл€ем новый объект в документ,выдел€ем его маркерами и сжимаем снизу вверх на такую высоту,какую ¬ы хотели бы видеть в роли фаски(или ширины заточки лезви€)

дальше любима€ операци€ перетаскиваем узел,наход€щийс€ на кончике лезви€ є2(узкое лезвие) чуть правее- это тоже нужно дл€ определени€ ширины "заточки" лезви€

помещаем узкое лезвие поверх широкого,так чтобы верхние грани лезвий почти совпадали

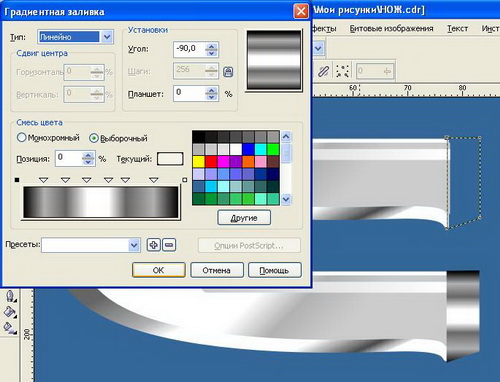
мен€ем градиент верхнего лезви€ на приблизительно такой
» убираем контур у обеих фигур

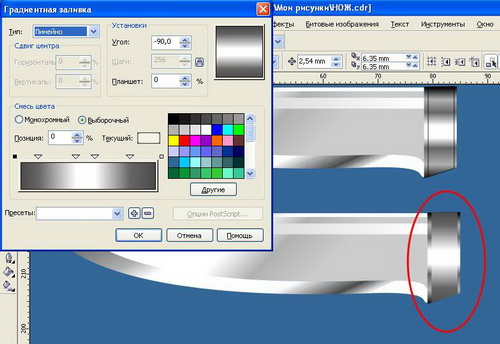
далее рисуем "кровосток"*,делаем это при помощи инструмента пр€моугольник,затем при помощи инструмента F10 сводим маркеры так чтобы получились закругленные углы,делаем линейную градиентную заливку и убираем контур,ну...как то так...

при помощи инструмента безье рисуем ограничительное кольцо дл€ лезви€ приблизительно такой формы
ƒелаем градиентную заливку и не забываем убрать контур
затем как и в случае с лезвием копируем эту деталь,вставл€ем,зауживаем слева направо и получаем приблизительно вот это

далее убираем контур мен€ем градиент и получаем это....ах да,чуть не забылдл€ лучшего эффекта "металличности" лезви€ сделаем легкое перетекание от узкого лезви€ к широкому


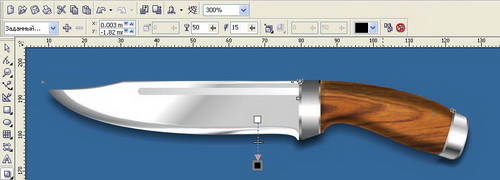
затем делаем по принципу ограничительного кольца дл€ лезви€ металлический наконечник дл€ руко€ти

–исуем ручку произвольной формы и "изгол€емс€" над ней
онвертируем тень в битовое изображение и размываем по гауссу с коффициентом 10

ƒелаем базовую прозрачность

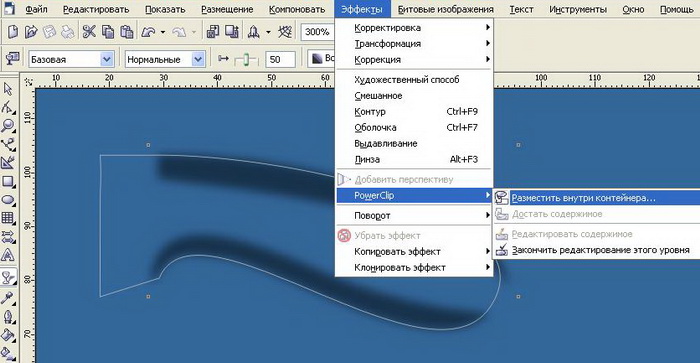
и помещаем внутри контейнера
заливаем ручку растровым узором,в данном случае дерево

”бираем контур

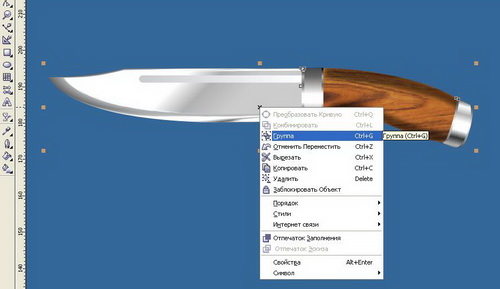
группируем полученные детали
добавл€ем тень

и ¬”ј Ћя
ј такое изображение можно сделать добавив бликов на ручку


